Other editors (VSCode, PyCharm, etc.)
Note
This feature requires Ploomber 0.14 or higher.
Ploomber can be entirely operated from the command-line, thus, independent of your text editor or IDE of choice. However, Ploomber comes with a Jupyter plugin that streamlines development via the cell injection process (to learn more about cell injection, click here).
If you’re not using Jupyter, you can still leverage the cell injection feature. Depending on your text editor/IDE capabilities, you may choose one of these options:
Use the percent format in .py files (recommended)
Pair .py files with .ipynb files (recommended if your editor does not support the
percentformat or if you’re running an oldJupyterLab 1.xversion)
To try out this feature, download our ml-basic example:
ploomber examples -n templates/ml-basic -o ml-basic
Then move to the ml-basic/ directory.
Using the percent format
Note
Editors such as VSCode, PyCharm, Spyder, and Atom (via Hydrogen) support the percent format.
The percent format allows you to represent .py files as notebooks by
separating cells using # %%:
# %%
# first cell
x = 1

# %%
# second cell
y = 2
The first step is to ensure that your scripts are in the percent format. You can re-format all of them with the following command:
ploomber nb --format py:percent
If you’re following this using our ml-basic example, you can run
such command, then open fit.py and see that the cells are delimited by
# %%.
Now, let’s inject the cell into each script manually:
ploomber nb --inject
If you open any of your pipeline scripts, you’ll see the injected cell. If
you’re following this with our ml-basic example; you’ll notice that
after running ploomber nb --inject, the fit.py file has a few new
lines:
# %% tags=["injected-parameters"]
upstream = {"join": "output/join.parquet"}

product = {
    "nb": "output/nb.ipynb",
    "model": "output/model.pickle",
}
In our ml-basic example, fit.py depends on the join task, which implies that
fit.py will use the output of join as input. Once you inject the cell,
you’ll see that Ploomber extracted the outputs of join and added them to
fit.py, now fit.py is complete, and you can run it interactively
without hardcoding paths.
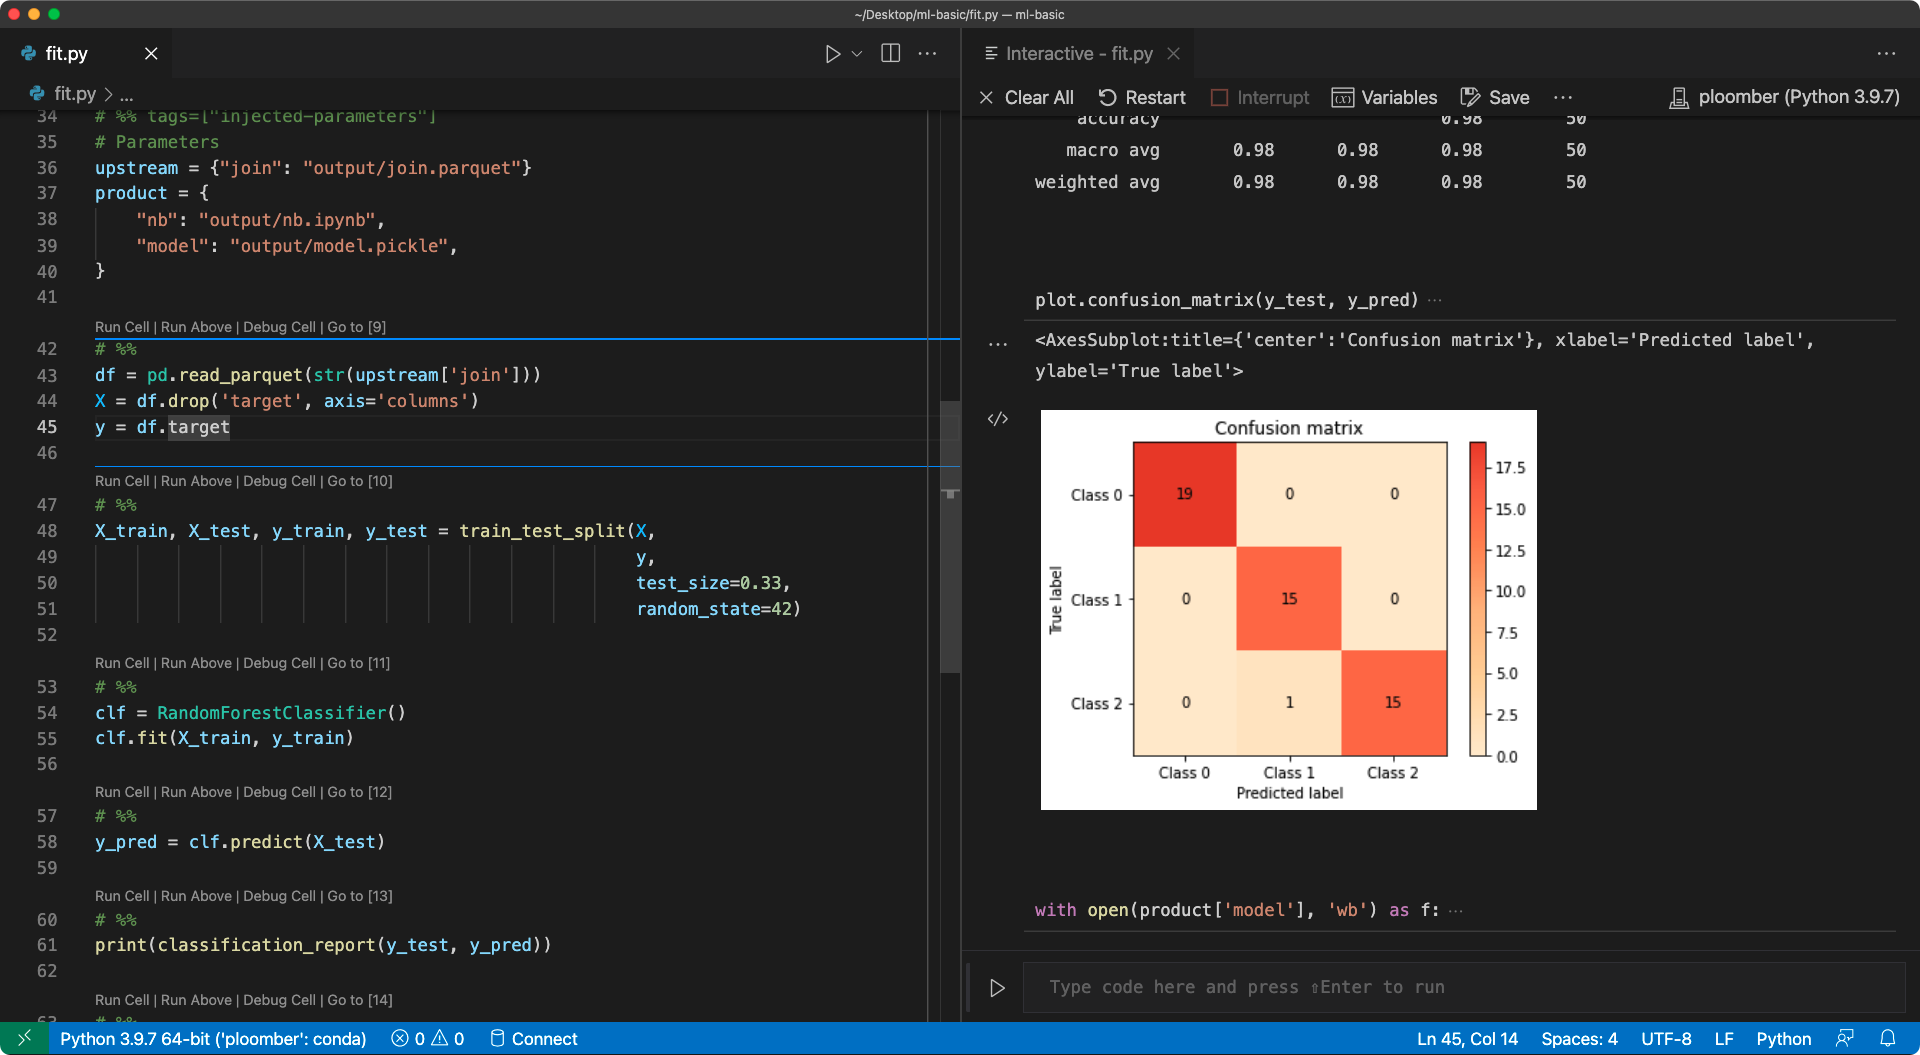
To test this, run ploomber build in a terminal to
generate all the outputs, then open fit.py and start running the script
(if you’re on VSCode, you can click on the Run Cell button at the beginning
of each cell). The following image shows the fit.py (left)
and the interactive output (right) on VSCode:
Important
Remember to run ploomber nb --inject whenever you change
your pipeline.yaml. You can set up a file watcher for pipeline.yaml.
Click here for a VSCode extension,
or here for a PyCharm example.
Note
By default, Ploomber deletes the injected cell when you save a
script/notebook from Jupyter; however, if you injected it via the
ploomber nb --inject command, this is disabled, and saving the
script/notebook will not remove the injected cell.
Pairing .ipynb files
If your editor does not support the percent format, or if running and old
JupyterLab 1.x version (e.g., if using Amazon Sagemaker),
you can pair .py and .ipynb files: this creates a synced .ipynb
copy of each .py task.
Say you have a pipeline with .py files, to create the .ipynb ones:
ploomber nb --pair notebooks
The command above will generate .ipynb files in a notebooks/ directory,
one per .py in your pipeline. If you’re following the ml-basic example,
you’ll see that a new notebooks/fit.ipynb file will appear after running
the previous command. Now, add the injected cell: ploomber nb --inject (more details in the the
previous section).
Tip
Keep your repository clean by adding the .ipynb files to your
.gitignore file.
Once you modify the .ipynb, you can sync their .py pairs with:
ploomber nb --sync
The following image shows the .ipynb / .py pair after running the sync
command:
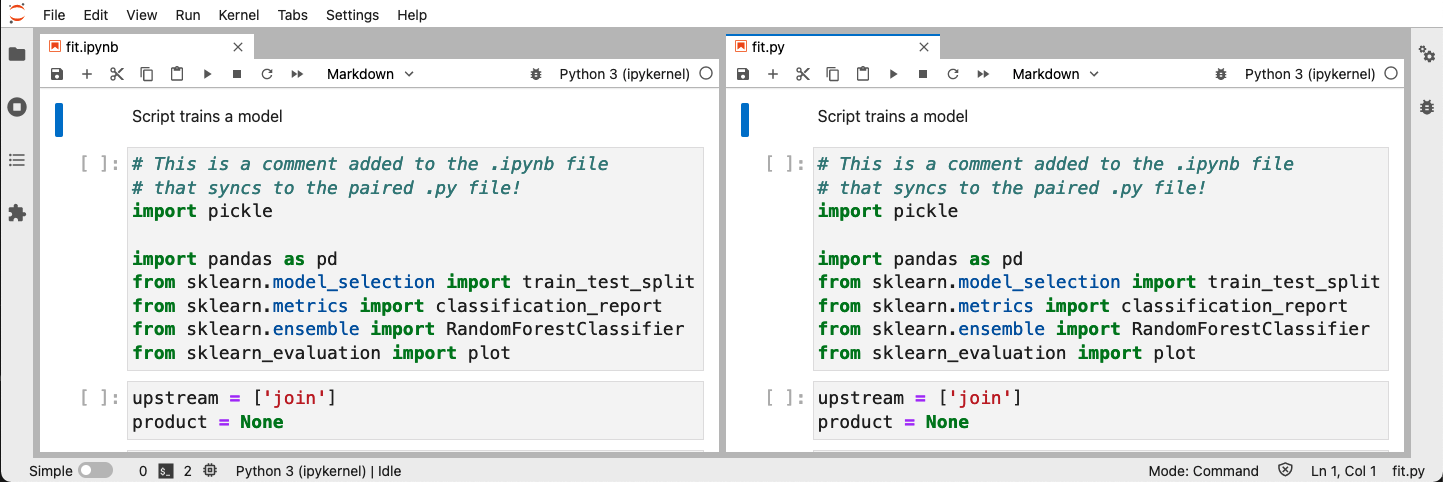
If you’re following this using the ml-basic command, modify
notebooks/fit.ipynb (e.g., add a comment in the first cell), run
ploomber nb --sync, and then open fit.py, you’ll see that the change
made to the .ipynb file is now visible in the fit.py file.
Tip
If you want the ploomber nb --sync command to run automatically before
you run git push, check out the git hooks section.
Using .ipynb as sources
As a last option, you have the option to use .ipynb files as task sources
in your pipeline.yaml:
tasks:
  - source: nbs/load.ipynb
    product: output/report.ipynb
Keep in mind that .ipynb files are hard to manage with git, so we recommend
you to use one of the alternative options described above.
To add the injected cell, follow the instructions from the previous section.
Removing the injected cell
If you wish to remove the injected cell from all scripts/notebooks:
ploomber nb --remove
Using git hooks
Important
ploomber nb --install-hook does not work on Windows
To keep your scripts/notebooks clean, it’s a good idea to keep the injected cell out of version control.
To automate injecting/removing, you can install git hooks that automatically remove the injected cells before committing files and inject them again after committing:
ploomber nb --install-hook
To uninstall the hooks:
ploomber nb --uninstall-hook